When I was taking piano lessons as a kid, my first piano teacher didn’t require me to learn the notes on the piano. Instead, she gave me an insert to slide behind the keys so I could identify them without having to think about it. I recall using that insert over and again every time I studied my piano lessons. Now I’m not criticizing her because this was many years ago and after all I was a kid and a beginning piano student.
After a year, I began taking piano lessons at school where there was a community school program that allowed me to take them during school hours. I’ll never forget my first piano lesson with my new piano teacher. I brought my old piano books with me and put them beside me on the bench. I pulled out my trusty insert and before I could place it behind the keys on the piano, my teacher said: What’s that? I told her it was an insert to help me learn the notes on the piano keys. With contempt for that item (I could see it on her face) she quickly folded it up and said: We won’t be using that. She then shoved it into one of my old piano books.
In what must have been less than 10 minutes, she taught me the notes on the piano keys. I was a little shocked at how easy it was. I couldn’t believe that I had spent the better part of a year playing the little songs and nursery rhymes that beginners play and I hadn’t even began to learn the notes on the piano. I discovered that this visual aid was a crutch!
Don’t make this mistake. It’s just too easy to learn the notes on the piano keys. You wouldn’t believe how many people use stickers or write on the piano keys with a sharpie.
Here’s the easiest and quickest tutorial to learn the notes on the piano keys in 7 easy steps:
Step 1 Recognize that the piano keyboard is just a simple pattern
It’s just a series of white keys with an offset of black keys in patterns of two and three.
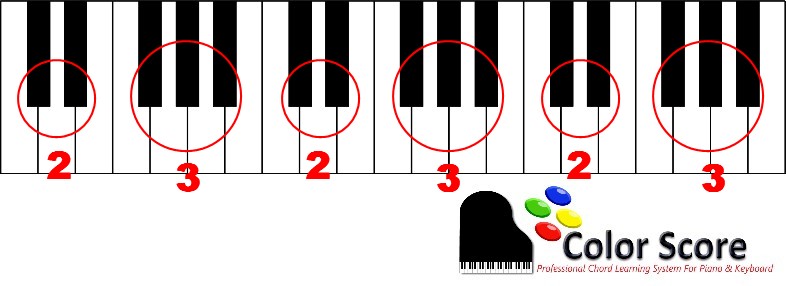
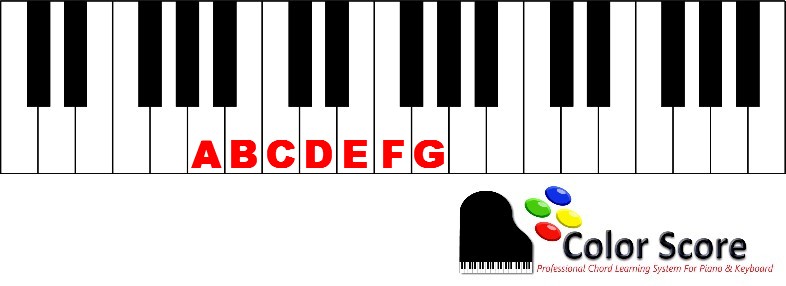
Step 2 Recognize that there are only 7 different lettered notes in music:
A B C D E F G
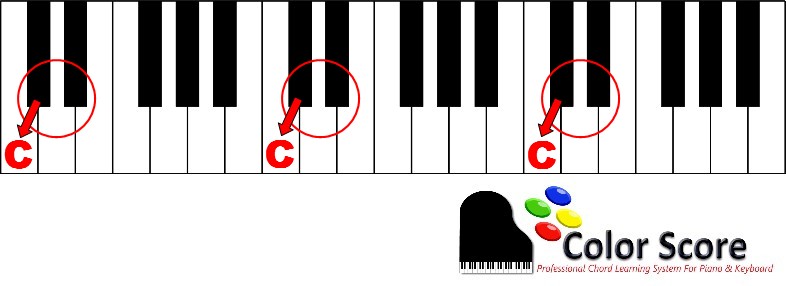
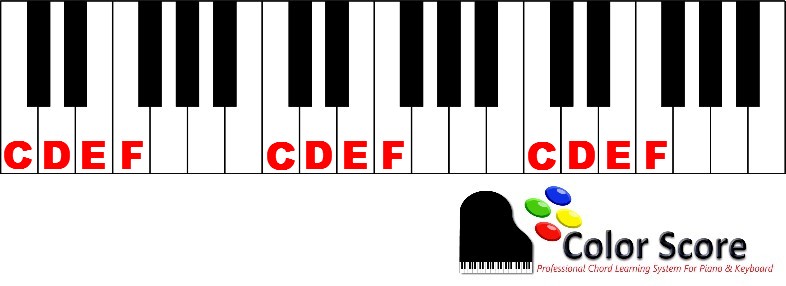
Step 3 Locate the key that is to the very left of the two black key patterns: This is the note C (play every one of them up and down the keyboard)
Step 4 Locate the key that is to the very left of the three black key patterns: This is the note F (play every one of them up and down the keyboard)
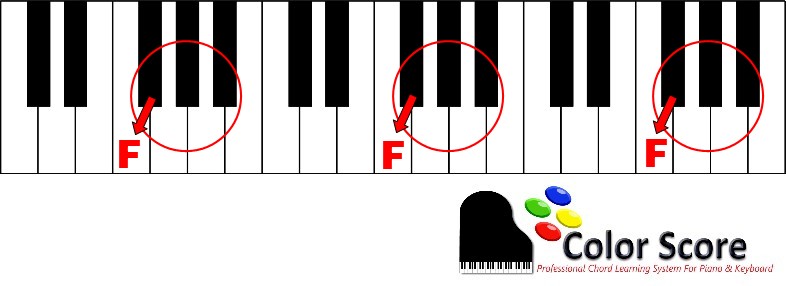
Step 5 Fill in the Gaps between C and F (this will be D & E)
Step 6 Fill in the Gaps between F and C ( this will be G A & B)
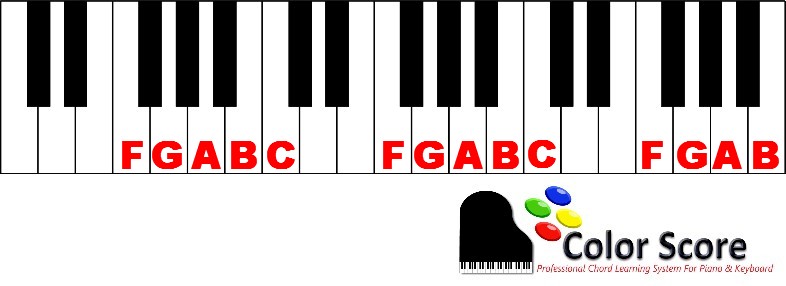
Step 7 Repeat this process until you can put your finger and identify any note anywhere on the piano.
Moving on to the black keys…
Beyond those 7 different notes you have your sharps and flats. It’s a really simple concept. If you move a note up a single key on to a black key it retains the same letter name and is referred to by its letter name and is sharp (IE A sharp).
Or moving one key down it is referred to as its flat counterpart (IE A flat)
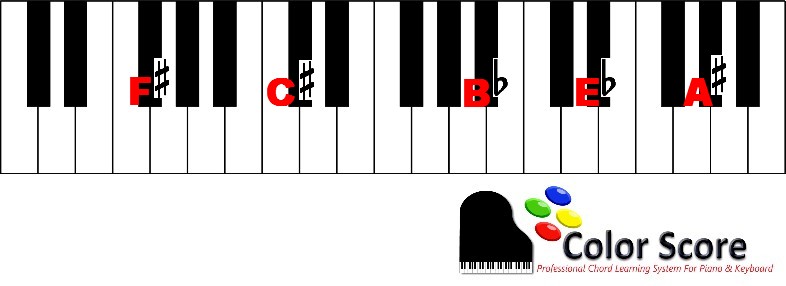
…just some random examples of sharps & flats on the piano
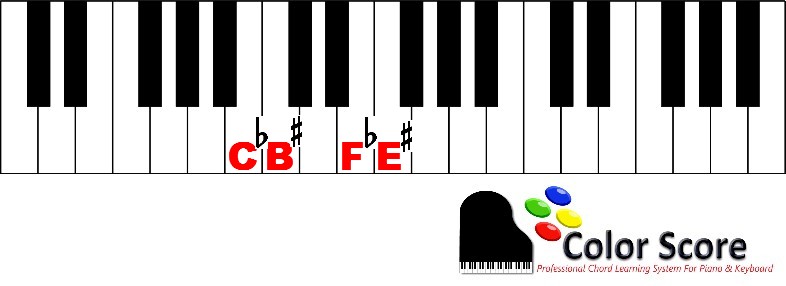
What about those white keys that don’t have a black key right next to them?
The concept is exactly the same when even when you don’t have a black key next to a white key. However it’s not common in most keys of music and as you progress and learn it will fall right into place.
Get this free instructional guide. It will help you remember the notes on the piano and you go through it as many times as you need to.
Greg Lee
Latest posts by Greg Lee (see all)
- What is a minor/Major 7 Chord? - October 26, 2023
- 7 Chord Substitutions that Professionals Use - October 19, 2023
- 5 Simple Chord Tricks to Sound Amazing - October 5, 2023


